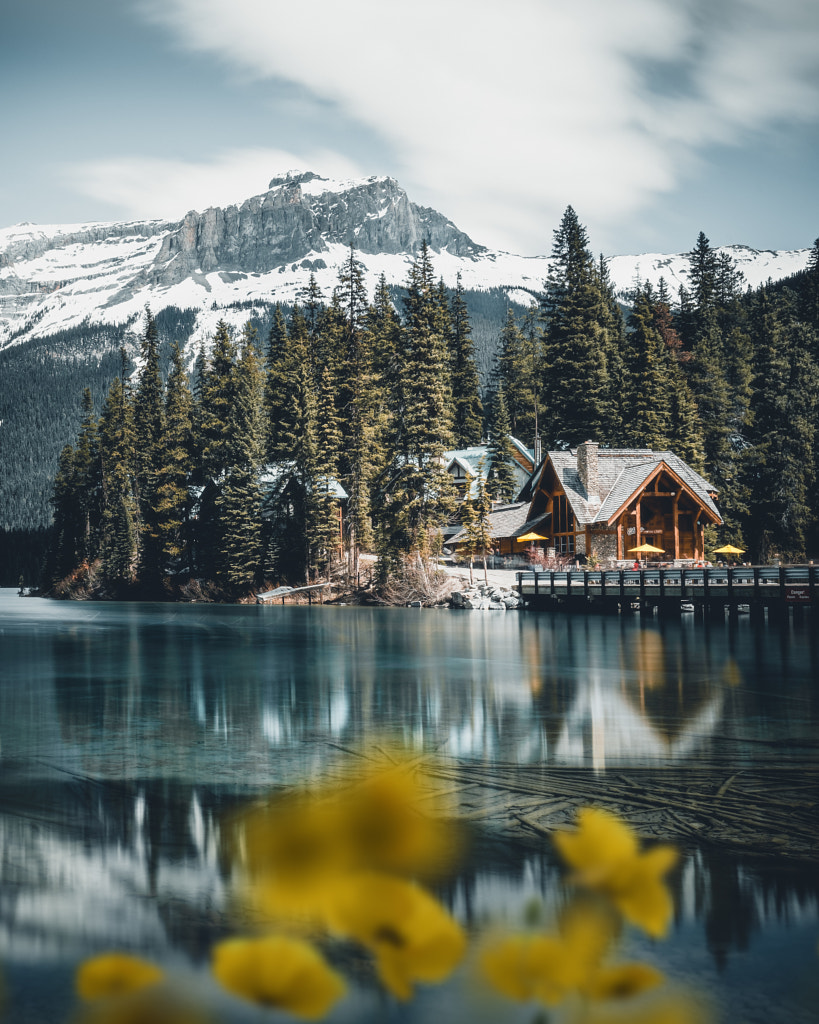
According to the 2021 Vrbo Trend Report, 61% of families are more likely to visit an outdoorsy destination than an urban one, and lakeside destinations offering camping and hiking opportunities experienced a boom in popularity.
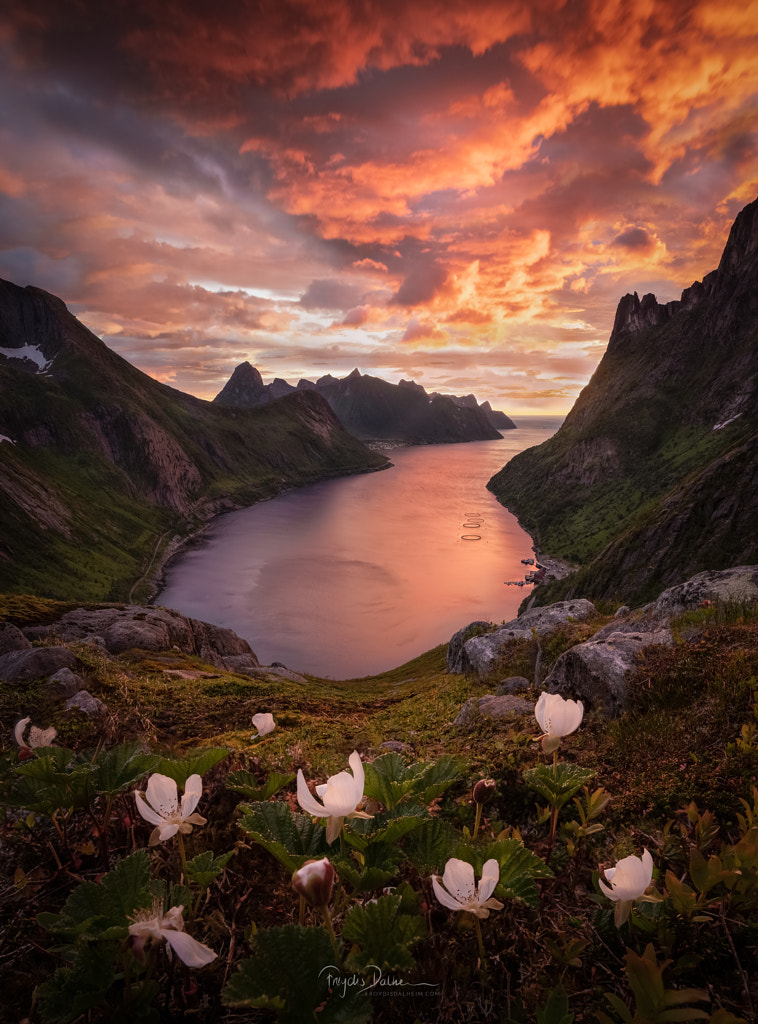
It’s been decades since Galen Rowell famously chased a rainbow while trekking in Tibet, ditching his camera bag in a bush along the way, but photographers continue to push themselves to their limits in search of those sublime moments that can only happen in nature. With interest in the outdoors on the rise, now is the perfect time for landscape photographers to venture out of their comfort zones and share the beauty of our planet. For those just getting started, here are our tips for hiking and camping with your camera.
Start slow
If you’re new to the outdoors, start locally. Search nearby parks for scenic trails; AllTrails and Trail Finder are two popular databases. If you’re interested in camping in the US or parts of Canada, Campspot offers a database of campgrounds, RV parks, cabins, and more. Ask more experienced hikers for recommendations based on your skill level; the outdoor photo community is tight-knit, so feel free to reach out to someone you admire.
Learn the ropes and gain hands-on experience in the field by taking day-hikes before graduating to short overnight trips. Build up slowly, and avoid rushing yourself; train your body by going from beginner trails to moderate ones. Consider bringing a friend, or choose a spot that’s well-traveled in case you have any issues. Finally, learn the rules that govern your location, including any permits you need.
Make a list, and check it twice
Campers and hikers know to pack the ten essentials: navigation (e.g., compass, topo map, GPS, personal locator beacon), light (e.g., a headlamp), sun protection (e.g., sunscreen, glasses), first aid, a camping knife, firestarter (e.g., matches, stove), shelter, plus extra food, water, and clothes. Photographers, of course, have this vital list as well as their gear.
Include only the most essential lenses and accessories in your gear list to save yourself the weight of unnecessary equipment. A single zoom lens can offer more flexibility than multiple primes, but primes are sharper, so tailor your pack to your goals. Remember to bring extra batteries (especially in the cold), memory cards, and any filters you use for landscapes (e.g., ND filters for long exposures or polarizers for bodies of water). You can keep your batteries in your sleeping bag overnight, so they stay nice and warm.
A lightweight but sturdy tripod like the Peak Design Travel Tripod is your best bet for the outdoors; these can be pricey, but many outfitters offer rentals. Novoflex even makes walking sticks that work overtime as monopods. Practice using all your camping and photography gear, from tents and stoves to filters and tripods, before you go so you’re prepared.
Stay organized
When exploring the outdoors, you want to keep your gear safe and easily accessible. If you’re keeping everything in your backpack, you can opt for a camera bag insert, like these made by F-Stop Gear, to stay organized. Pack it last so it’s at the top of your backpack. Alternatively, if you’re looking for a backpack that can hold your camera gear as well as your camping equipment, you might look into something like the Whistler Backpack 450 AW II from Lowepro.
A regular camera strap can cause neck and back pain while hiking, so instead, choose a holster or clip. The Capture Camera Clip by Peak Design, the SpiderX Backpacker Kit, camera harnesses from Cotton Carrier, or the Digital Holster Harness V2.0 from Think Tank, are a few popular options. You might have to experiment with different setups to see what works best for you. Additionally, beware of dust. Avoid changing your lens when you’re out hiking, and carry a blower or microfiber cloth in case.
Know your location
Every spot offers unique challenges, so do your research, consult more experienced hikers, and prepare for any potential safety hazards. Some places are vulnerable to flash flooding, for example, and other spots are home to curious (and hungry) bears. Studying the terrain is essential for safety, and it can also help you capture the landscape at its best.
If, for instance, you plan to hike Kebler Pass in Colorado, you might choose to schedule your trip for the fall to catch the aspen trees at just the right moment. On the other hand, if you’re headed for Point Reyes National Seashore, your best bet would be to go during wildflower season.
Leave no trace
Before you head outside, study up on leave-no-trace principles: make sure you take everything you brought back with you (including food and toiletries), and keep water sources fresh and clear (do your washing away from streams!). If you find garbage left on a trail by someone else, pick it up.
If you must light a fire, do so in established fire rings. Another thing to keep in mind is tagging your exact location; if it’s a vulnerable spot, you might prefer to keep it private, so it’s not overrun with tourists and photographers. It goes without saying, but don’t disturb the wildlife, and never feed wild animals; you’re in their space, and it’s your job to respect that.
Dress in layers
Temperatures can change dramatically overnight, so remember to pack multiple layers, including long underwear, hiking pants, synthetic shirts, a fleece, a light jacket for warmth, and a waterproof jacket and pants. You’ll want to bring socks (liners plus main hiking socks) to wear inside your hiking boots. Hats and gloves are also key; remember to select gloves that won’t hinder your ability to adjust your camera settings. Check the weather forecast to decide what to pack and what you can leave at home.

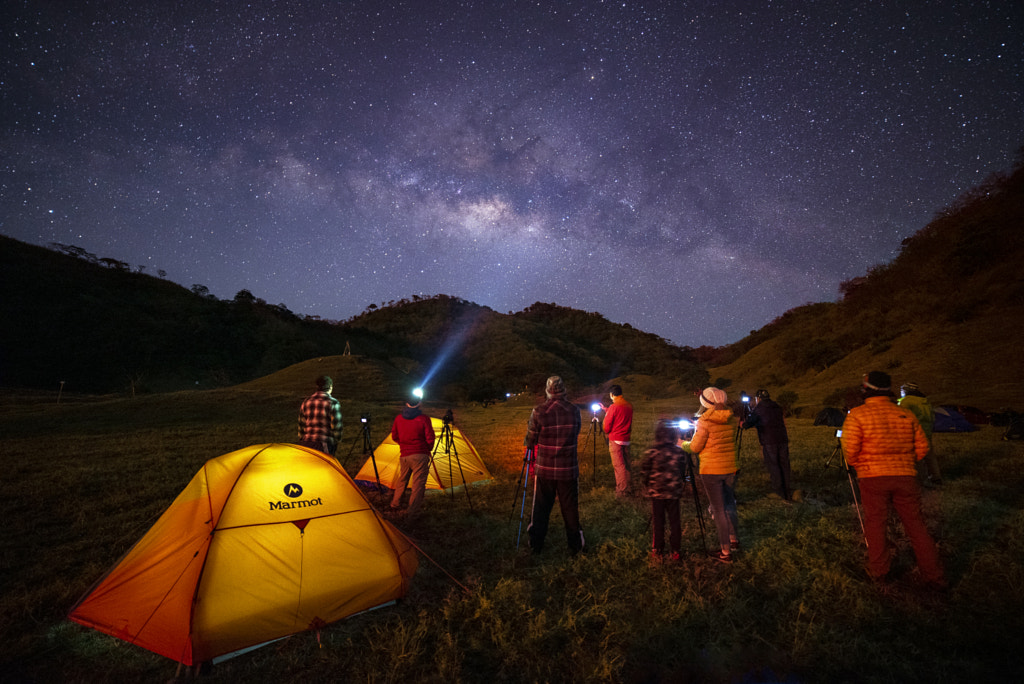
Make a schedule
When planning your day, give yourself plenty of time to get from camp to your shoot location and back before it gets dark. Be realistic, and if you’re allowed, camp closer to your site of choice so that you don’t have to wake up even earlier to catch the sunrise. As always, the golden hours are usually best for landscapes, so set your schedule according to the natural lighting conditions.
One of my favorite camping anecdotes dates back to 1938, when Ansel Adams took Georgia O’Keeffe, David McAlpin, and Helen and Godfrey S. Rockefeller on a trip to Yosemite. Everything revolved around beautiful light: the group woke up early to have coffee and breakfast before setting out to explore, and dinner was always scheduled for after sunset so that everyone could photograph the scenery at dusk.
Not on 500px yet? Sign up here to explore more impactful photography.
The post Seven camping and hiking tips for landscape photographers appeared first on 500px.
from 500px https://ift.tt/4dFMhk0
via IFTTT
Comments
Post a Comment